Choosing the right concealer tool feels like a constant battle. You want a flawless finish, but the wrong applicator can leave you with cakey texture or visible blemishes.
For high-coverage spot concealing1 and precise lines, use a brush. For blending undereyes, softening edges, and achieving a seamless, skin-like finish, use a damp sponge. The best tool depends on your concealer’s formula and the area you’re covering.

The debate between brushes and sponges is one I’ve seen from every angle—from the factory floor where these tools are made to conversations with brand founders launching their first concealer. It’s not about one being "better" than the other. It’s about making a strategic choice. Let’s break down the data, expert advice, and manufacturing insights so you can choose the right tool for the job, every single time.
Using a sponge allows 60% of your concealer to be absorbed into your bloodstream.False
This is a pervasive myth. The skin is an effective barrier, and cosmetic molecules are generally too large to penetrate the bloodstream during normal application. The tool affects surface finish, not systemic absorption.
”DampFalse
”A
Which tool should you use for undereyes vs blemishes? A data-backed decision.
Your concealer looks perfect on a blemish but turns cakey under your eyes. This inconsistency is frustrating, but it’s often the tool, not the formula, that’s to blame.
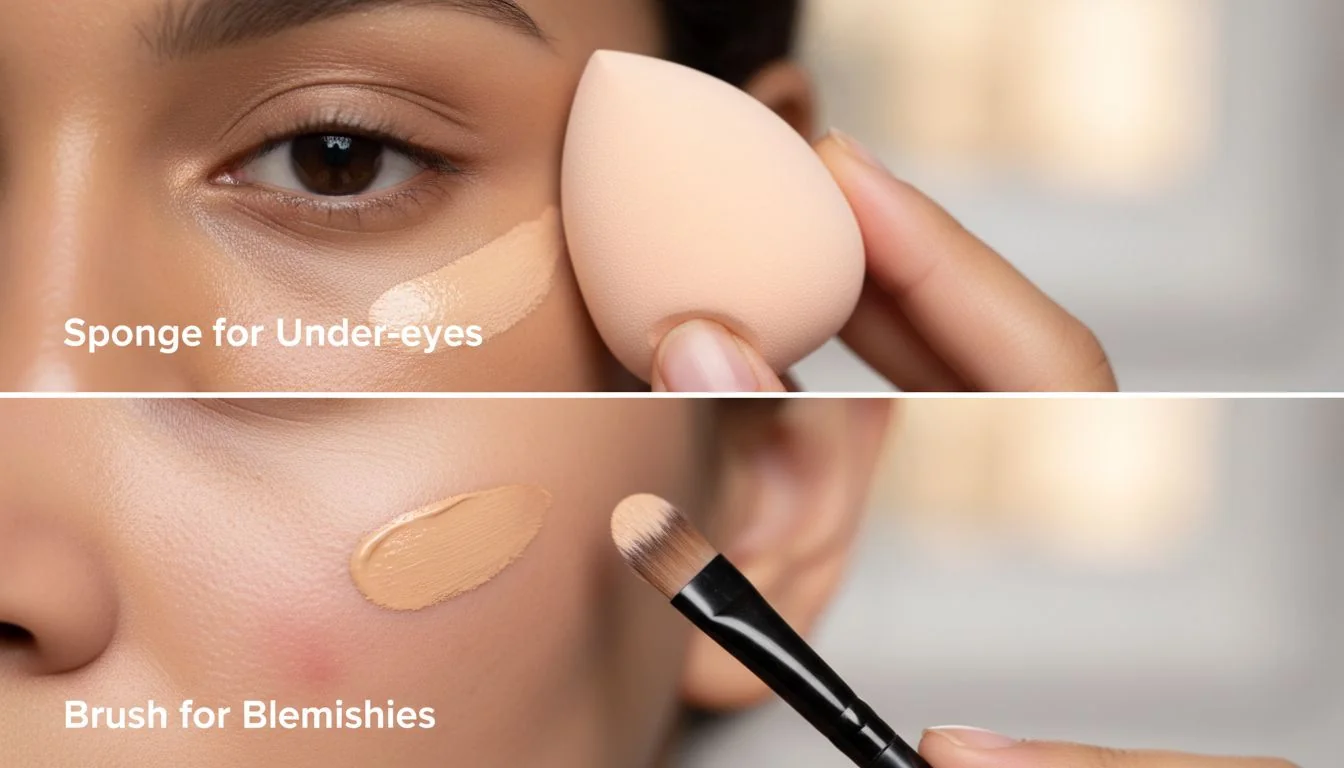
For dry or textured undereyes, use a damp sponge2 to blend liquid concealers seamlessly. For blemishes, use a small, dense synthetic brush to place thicker cream formulas with high precision and coverage, preventing a patchy look.

When I work with brands developing applicators, the first question is always: what problem are we solving? The problems of the undereye area and a blemish are completely different, so they require different engineering.
The Undereye Challenge: Texture and Creasing
The skin under our eyes is thin, delicate, and prone to dryness and fine lines. Applying too much product or using a dragging motion will almost always lead to creasing and a heavy, textured look. A damp sponge is the solution here. Its bouncing or "stippling" motion gently presses a thin layer of product onto the skin, while the moisture in the sponge helps sheer out the formula for a more natural finish. It diffuses the edges beautifully, creating that seamless blend3 MUAs and beginners love.
The Blemish Solution: Precision and Opacity
Covering a raised or discolored blemish requires the opposite approach. You need maximum opacity in a very small, targeted area. A sponge, designed to blend and sheer, will often lift the product right off the spot you’re trying to cover. This is where a small, dense, synthetic brush excels. The firm bristles pick up and deposit a concentrated amount of a thicker, creamier concealer exactly where you need it, allowing you to build coverage without disturbing the layers underneath.
| Skin Concern | Concealer Formula | Recommended Tool | Finish Outcome | Coverage Level |
|---|---|---|---|---|
| Dry/Textured Undereye | Thin Liquid / Serum | Damp Sponge | Seamless, skin-like | Sheer to Medium |
| Active Blemish | Thick Cream / Pot | Small, Dense Brush | Opaque, matte | High, Buildable |
| Enlarged Pores | Medium Liquid | Dense Brush (stippling) | Airbrushed, smooth | Medium to Full |
| Hyperpigmentation | Medium to Thick Liquid | Flat Synthetic Brush | Even, full coverage | Full |
You should always use a brush for liquid concealers to get the most coverage.False
While a brush can provide high coverage, a damp sponge is often better for blending thin liquid concealers on textured areas like the undereyes to prevent cakiness.
A dense brush provides more targeted, opaque coverage for blemishes than a sponge does.True
The firm bristles of a dense brush allow for precise placement and building of product, while a sponge's porous surface tends to sheer out and diffuse concealer, reducing spot coverage.
How does hygiene impact tool choice in pro kits and salons?
You’ve sourced the perfect tools for your beauty brand, but are they safe for professional use? A single contaminated applicator can cause breakouts and infections, damaging your brand’s reputation.
Damp sponges carry a significantly higher contamination risk, with studies showing massive bacterial loads. They require daily cleaning and frequent replacement. Brushes are easier and faster to sanitize between clients, making them a safer default for pro kits and salons.

In my years overseeing production, quality control wasn’t just about performance—it was about safety. For brand owners and professional artists, hygiene isn’t optional; it’s a non-negotiable part of your service. The data on tool contamination is eye-opening and should directly inform your protocols.
The Sponge’s Microbial Risk
A groundbreaking 2020 study in the Journal of Applied Microbiology tested used makeup products and found that sponges were the riskiest. Key findings showed that 79-90% of all used products were contaminated, but beauty blenders were hotspots, averaging over a million colony-forming units of bacteria per milliliter (>10^6 CFU/ml). The study also found that 93% of users admitted to never cleaning their sponge, and 64% had dropped it on the floor and continued to use it. The damp, porous environment is a perfect breeding ground for bacteria and fungi, making shared or improperly cleaned sponges a major liability in a professional setting.
The Brush’s Sanitation Advantage
Brushes, particularly those with synthetic bristles, present a much lower hygiene risk if maintained properly. The non-porous fibers don’t harbor moisture in the same way a sponge does. This makes them far easier to sanitize between clients using an alcohol-based, quick-dry spray cleanser. This process effectively kills pathogens in seconds, allowing an artist to safely move from one client to the next. While they still require weekly deep cleaning with soap and water, their day-to-day sanitation is faster and more reliable, which is critical in a busy salon or on a shoot.
Washing a beauty blender with just water is enough to sanitize it for professional use.False
Water alone is not sufficient. To properly sanitize a sponge, you must use an antimicrobial soap or cleanser and ensure it is completely dry to prevent new bacterial growth. For pro use, single-use sponges are the safest option.
Peer-reviewed studies found that over 90% of users admitted to never cleaning their beauty blender.True
The 2019 study published in the Journal of Applied Microbiology reported that 93% of surveyed beauty blender users had never cleaned their sponge, highlighting the high risk of contamination in typical use.
Do sponges waste more product than brushes? What the science and testing say.
You constantly hear that sponges "eat" or absorb your expensive concealer, making you wonder if you’re getting the most value from your products. Is this fact or just a popular myth?
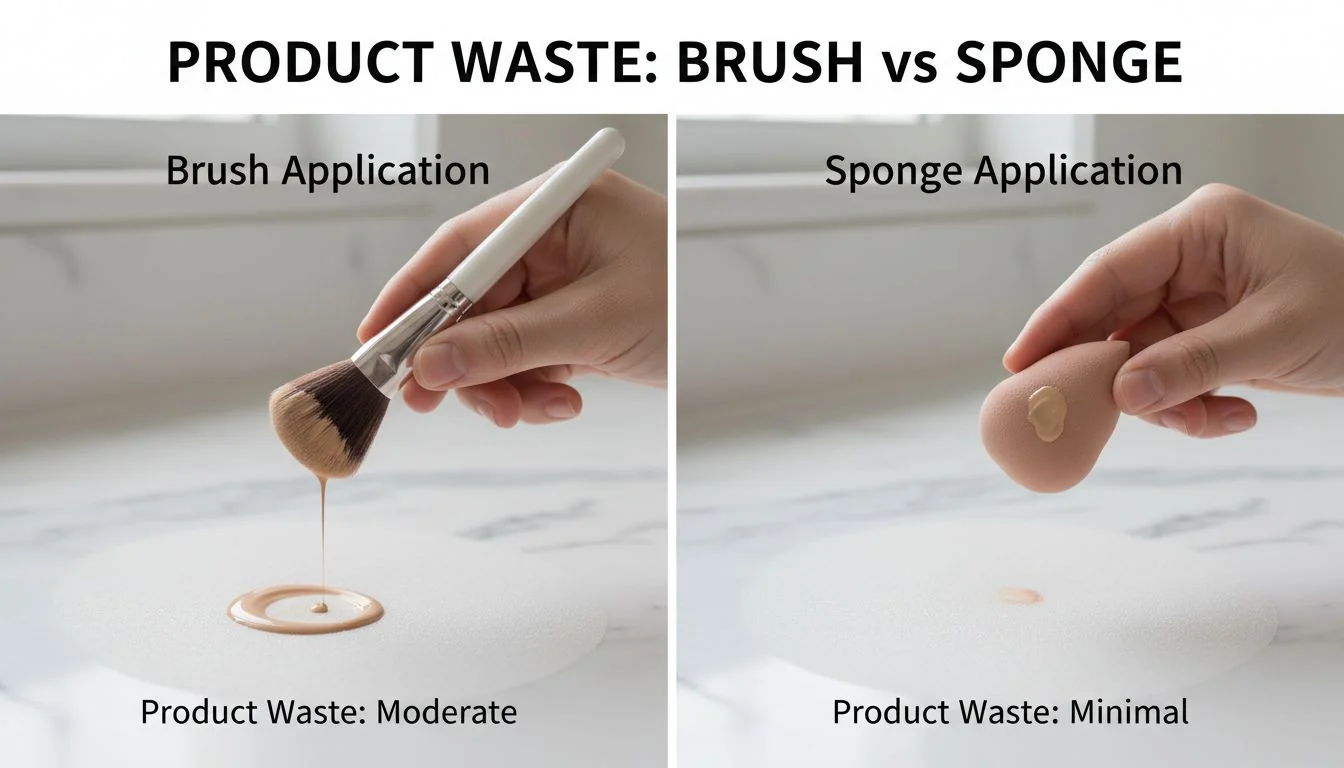
Sponges do absorb some product, but the amount is often overstated and can be minimized by properly dampening the sponge first. A brush is more efficient for maximum opacity, but the choice is ultimately about finish and control, not just product waste4.

The product waste narrative is one of the biggest points of confusion in the brush vs. sponge debate. While it’s true that a dry sponge will soak up liquid makeup like, well, a sponge, the story changes completely once you add water.
The Physics of a Damp Sponge
High-quality makeup sponges are made from hydrophilic (water-loving) material. When you run one under water and squeeze it out, the sponge’s porous structure fills with water. Because it’s already full, it has very little room left to absorb your concealer. Instead, the product sits mostly on the surface, ready to be blended onto your skin. Any minor absorption is the trade-off for the beautiful, airbrushed finish it provides. When we test sponges for brands, "absorption rate" is a key metric, but it’s evaluated on a damp sponge, as that’s the correct way to use it.
Debunking the Skin Absorption Myth
Let’s also clear up a related myth: that your application tool affects how much product gets into your bloodstream. Claims that "60% of what you put on your skin is absorbed" are scientifically inaccurate in the context of cosmetics. The skin’s outer layer, the epidermis, is an incredibly effective barrier. Most cosmetic molecules are far too large to penetrate it. Your brush or sponge is designed to distribute product on top of the skin to create a visual effect. The tool choice influences the finish, not systemic absorption.
Using a sponge dry saves more product than using it damp.False
A dry sponge is highly absorbent and will soak up a significant amount of liquid or cream makeup. A damp sponge is already filled with water, which prevents it from absorbing as much product.
The skin's primary function is to act as a barrier, and cosmetic product absorption is minimal during typical application.True
The epidermis is designed to keep substances out. While some very small molecules can penetrate, the vast majority of cosmetic ingredients remain on the surface, and the choice of applicator has a negligible effect on penetration.
OEM selection guide: matching concealer formulas to brush hair, density, and sponge material?
As a brand founder, you need to source the perfect applicator for your new concealer. A mismatch can make your amazing formula underperform, leading to bad reviews and lost sales.
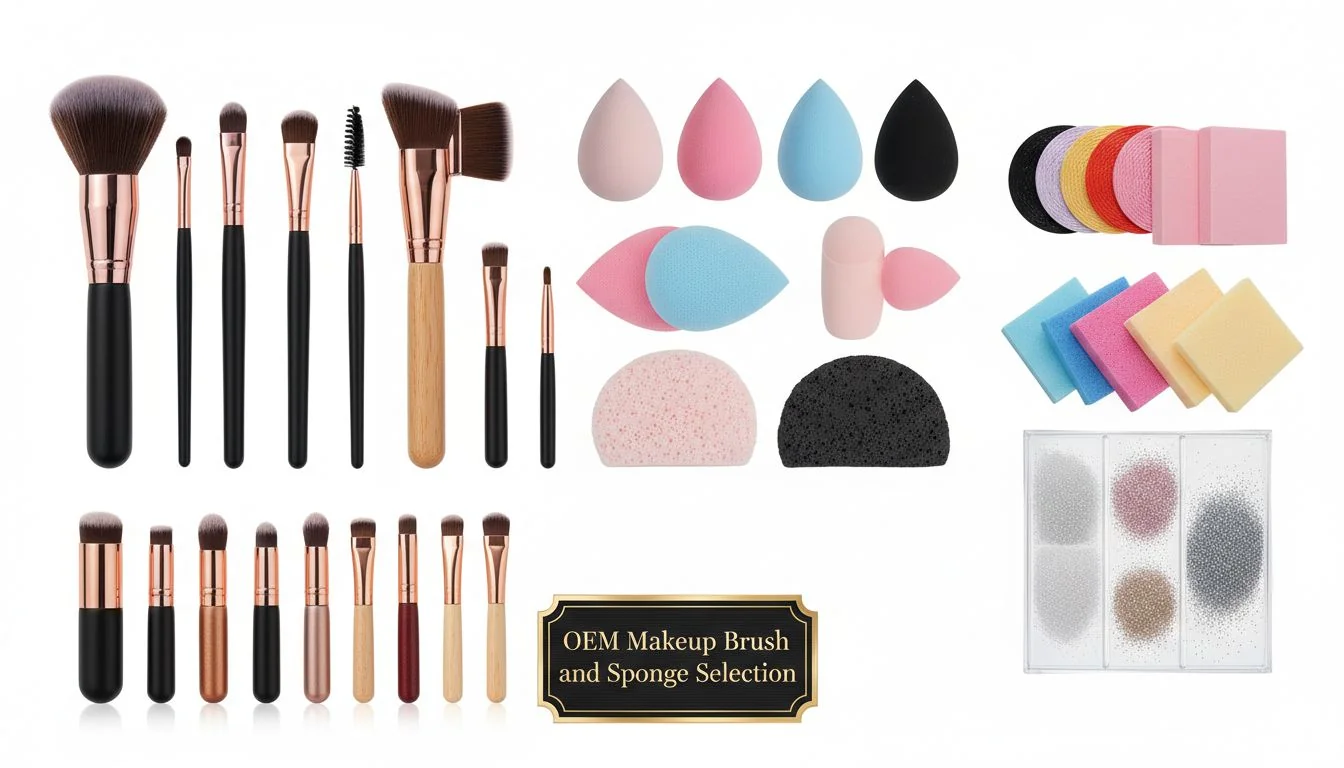
Pair thick, cream concealers with dense, short synthetic brushes5 for precise stippling. For thin, liquid, or serum concealers, choose a hydrophilic polyurethane sponge for smooth, seamless blending. Matching the tool to the formula is key to performance.

This is where my experience on the factory floor becomes so valuable for the brand founders I partner with. Choosing the right OEM tool isn’t just about a logo; it’s about technical specifications that make your product shine. Let’s get specific.
For Thick Cream & Pot Concealers
Your tool needs to have enough strength to pick up and place a dense formula without the bristles splaying.
- Hair: Always choose high-quality synthetic fibers. They are less porous than natural hair, meaning they won’t absorb the cream product, are easier to clean, and are cruelty-free.
- Density: Look for a high-density brush. The tightly packed bristles provide the firmness needed for stippling and buffing.
- Shape: A small, rounded brush head, a mini flat-top kabuki, or a precise angled shape works best. These give you control for spot concealing or carving out brows.
For Thin Liquid & Serum Concealers
Here, the goal is a smooth, even blend without streaks.
- Material: The industry standard is hydrophilic (water-activated) polyurethane foam. This is the material that swells when wet, ensuring minimal product absorption and a flawless bounce.
- Density & Porosity: You want a sponge with a fine, consistent cell structure. This creates a soft, smooth surface that won’t leave a porous texture on the skin.
- Shape: The classic teardrop is versatile, with the pointed tip for corners and the rounded bottom for larger areas. Micro-mini sponges are excellent for targeted undereye and inner-corner work.
As a brand owner, always request samples and test them with your specific formula. A reliable OEM partner will understand these nuances and help you engineer the perfect applicator.
Natural hair brushes are the best choice for all concealer formulas.False
Synthetic brushes are superior for cream and liquid products. They are less absorbent, easier to sanitize, more durable, and cruelty-free, making them the professional standard for concealers.
Hydrophilic polyurethane is the technical name for the material used in most water-activated blending sponges.True
This 'water-loving' polymer is specifically engineered to swell when saturated with water, which is the key mechanism that allows for smooth application and minimal product absorption.
Conclusion
The right tool depends on your goal. Use a brush for precision coverage and a sponge for a seamless blend. Choose wisely to perfect your application and protect your health.
References
-
Understanding high-coverage spot concealing can help you achieve a flawless look and choose the right tools. ↩
-
Learning the proper technique for using a damp sponge can enhance your makeup application and finish. ↩
-
Learning techniques for achieving a seamless blend can elevate your makeup skills and overall look. ↩
-
Investigating product waste can help you make informed decisions about your makeup application tools. ↩
-
Understanding the benefits of synthetic brushes can enhance your makeup application and hygiene practices. ↩


